Okay, so it’s been a long time since I posted. Lots has been happening on site! But prioritizing the blog has been difficult. That said, the below work took place in April of this year. I’ll catch up and get back on track soon. For now, where did I leave off? Oh, right…
If the previous steps of this project were all about clearing and digging into the ground to provide space and solid footing for the foundation, the next few steps in the process are geared toward “getting out of the ground.” With what seemed like near constant rainfall this spring, I was eager to build myself up out of the mud as quickly as possible.
Before I could do that, however, there was a lot of prep work to be done for the foundation walls. For me, that consisted of the footings, perimeter drainage, a sump basin, and a radon mitigation system.
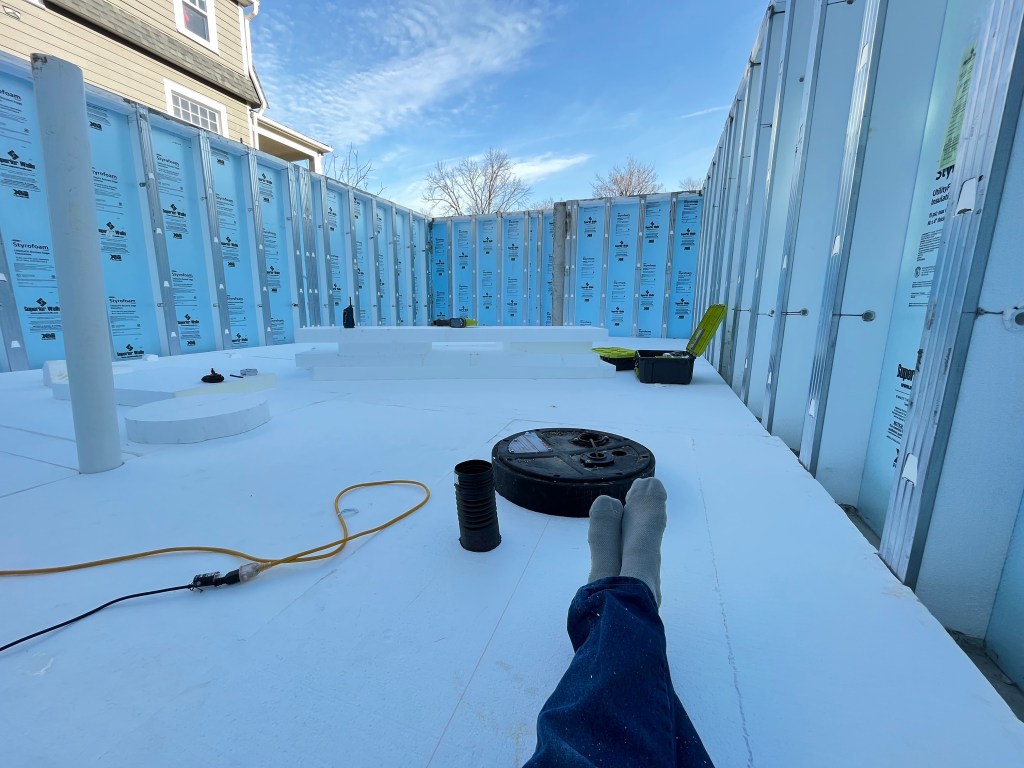
To start with the foundation, I have to first explain that my construction method here is not typical (a recurring theme moving forward with the rest of the project, for better and worse). For a number of reasons including ease of site logistics, predictable results, and higher thermal performance, I chose a pre-cast, insulated concrete foundation wall system in lieu of poured-in-place walls that are used in most residential construction. Going the pre-cast route meant that I would not need to bring in foundation forms, a concrete truck, pump truck, and a whole crew of people for multiple days to assemble forms, fill them with concrete, and then disassemble and haul the forms away in multiple steps. On a tight lot with limited access such as mine, simplifying on-site work is a big advantage.

Another significant advantage of the manufactured panels I chose is that they provide some level of thermal insulation right out of the gate. These walls feature continuous interior rigid foam insulation, which is a great starting point for my passive house basement. Not only will the thermal insulation lead to energy savings, but the finished basement benefits greatly in terms of comfort as a result.
Passive House Principle #1: Continuous Insulation
Now is a great time to start introducing the concepts that make a passive house unique. Here, the term “passive” refers to the lack of need for large, complex, active machinery that requires constant energy/financial inputs to keep the house conditioned. The focus is on reducing energy needs so that HVAC systems, for example need not be so large.
First among the five principles that define a passive house is a sufficient amount of continuous insulation to effectively minimize heat transfer through the building envelope. What counts as “sufficient?” Essentially, enough to lower ongoing heating and cooling costs by about the same amount as additional financed, upfront costs of the added insulation. I’m basically trading some added mortgage cost for a substantial reduction of a typical monthly energy bill. I may even pay the same per month as with a conventional house, but I’m paying for a feature that reduces energy cost for the life of the building. That adds value that will stay with the house, especially as energy costs climb in the future.
Residential codes all over the U.S. require the use of insulation, so how is a passive house any different? In many parts of the country (I’m generalizing here, as there are some more progressive areas that have adopted more stringent standards), it is completely acceptable by building code to build 2×6 exterior walls, fill between the studs with fiberglass, and call it a thermal success. But although the fiberglass in such a wall provides around R-21, the studs are only around R-6 or R-7. Around three times as much heat can flow through typical construction lumber as compared to insulation. The actual R-value (the measure of resistance to heat flow) of a 2×6 framed wall without additional continuous insulation ends up being only around R-15, due to the thermal bridging that occurs through the wood framing members that extend from exterior to interior of the wall.
The above applies for framed walls above the ground, but the situation below grade is similar. By code, around central Ohio it would be acceptable to only have about R-8 insulation around the upper perimeter of the foundation down to around frost line depth.
All this is a bit different for Clintonville Passive House, starting with the foundation. Added to the insulation already in the pre-cast foundation is exterior rigid insulation around the outside of the basement walls, for a total average insulation value of about R-20. Similarly, my above grade walls will go far above the code minimum requirements to achieve about R-37. I’ve also placed a whopping eight inches of EPS foam insulation (~R-32) underneath the basement slab—in hindsight, a bit more than needed.

The purpose of all this extra insulation is not only to save energy costs. With a layer of continuous insulation thermal bridging is minimized, and that means the interior surfaces of the home will be very near to the interior air temperature, even during exceptionally cold or hot weather. No frigid floors or walls in the deep of winter that suck the heat out of you, and no hot ceilings as the attic radiates warmth while you’re lying in bed after a 104°F day in July. Keeping interior surfaces near the inside air temperature also prevents condensation that could foster mold growth. Sufficient, continuous insulation, then, means better durability and a healthier environment in addition to energy savings.
There are four more principles of passive house, but I’ll introduce those as I continue with the build, pointing them out and explaining their importance as they’re built into the project.
That’s it for the foundation. Next time you see it, the ground will be backfilled, and I’ll truly be “out of the ground!” For now, I’m going to enjoy the first phase of building success with the installation of my basement walls.


Leave a comment